Showing posts with label Porto USk symposium. Show all posts

Monday, August 27, 2018

Early Summer and Portugal Sketchbooks Bound

My early summer sketchbook

The smoky skies have been keeping me indoors with the windows and doors tightly closed. I don’t like it at all, especially in August, but being shut in has enabled me to get several things done that I haven’t otherwise made time for. At the top of my list was binding my Portugal sketchbook and the last sketchbook before that.

My early summer sketchbook (above) includes our trip to Yosemite in May, so the front cover shows my sketch of upper and lower Yosemite Falls. On the back is the sketch of our house, which I had made just before we left for Portugal.
 
My Portugal sketchbook

As is my tradition for all my travel sketchbooks, the covers of my Portugal sketchbook are collages of maps, postcards and other ephemera. I bound the symposium program right into the sketchbook: I just removed the staples and drilled the program pages and related planning papers using the same hole template that I use for all my signatures. In the center of that signature I included my “certificate of participation” from the symposium (yes, I spotted the typo 😕). I filled blank spaces with cards that I had swapped with new people I met in Porto.
 
The symposium program is bound right into the sketchbook.

I taped in the cards I collected from sketchers I met in Porto.

I "graduated" from another symposium!

Before I started sketching, I used to save ephemera from trips by shoving it all into a bag or box and then forgetting about it. Now I find a place in my sketchbook for any scraps of paper I really want to save, and the rest get recycled. I like the tidiness of everything in one bound book, and it cuts down on clutter that I never look at. My travel sketchbooks, on the other hand, are so much fun to look back through, again and again.

Friday, August 10, 2018

Porto Symposium, Part 4: Sketch Kit Review, Swag, Shopping

Porto swag!

With all I’ve written about the Porto symposium, I know that what you really want to see is the swag 😉, so I won’t make you wait any longer.

New colors added to my usual daily-carry.
More on that in a bit, but first I want to do the all-important sketch kit review: How did my prep match what I needed in reality? You may recall that my kit prep didn’t amount to much. I added a few colors to my pencil palette that I thought would come in handy in Portugal, and they did. I used russet (065) nearly every day for all those tile rooftops, and cobalt green (182) came in hand several times for verdigris trim. Although I had thought my wide-ranging palette would cover the pastel-colored buildings I’d seen in photos, I regretted that I didn’t have peach or salmon, which I saw frequently in the residential hillscape. I made do with a mix of middle purple-pink and Cornelian. Overall, my usual daily-carry kit served me fine.
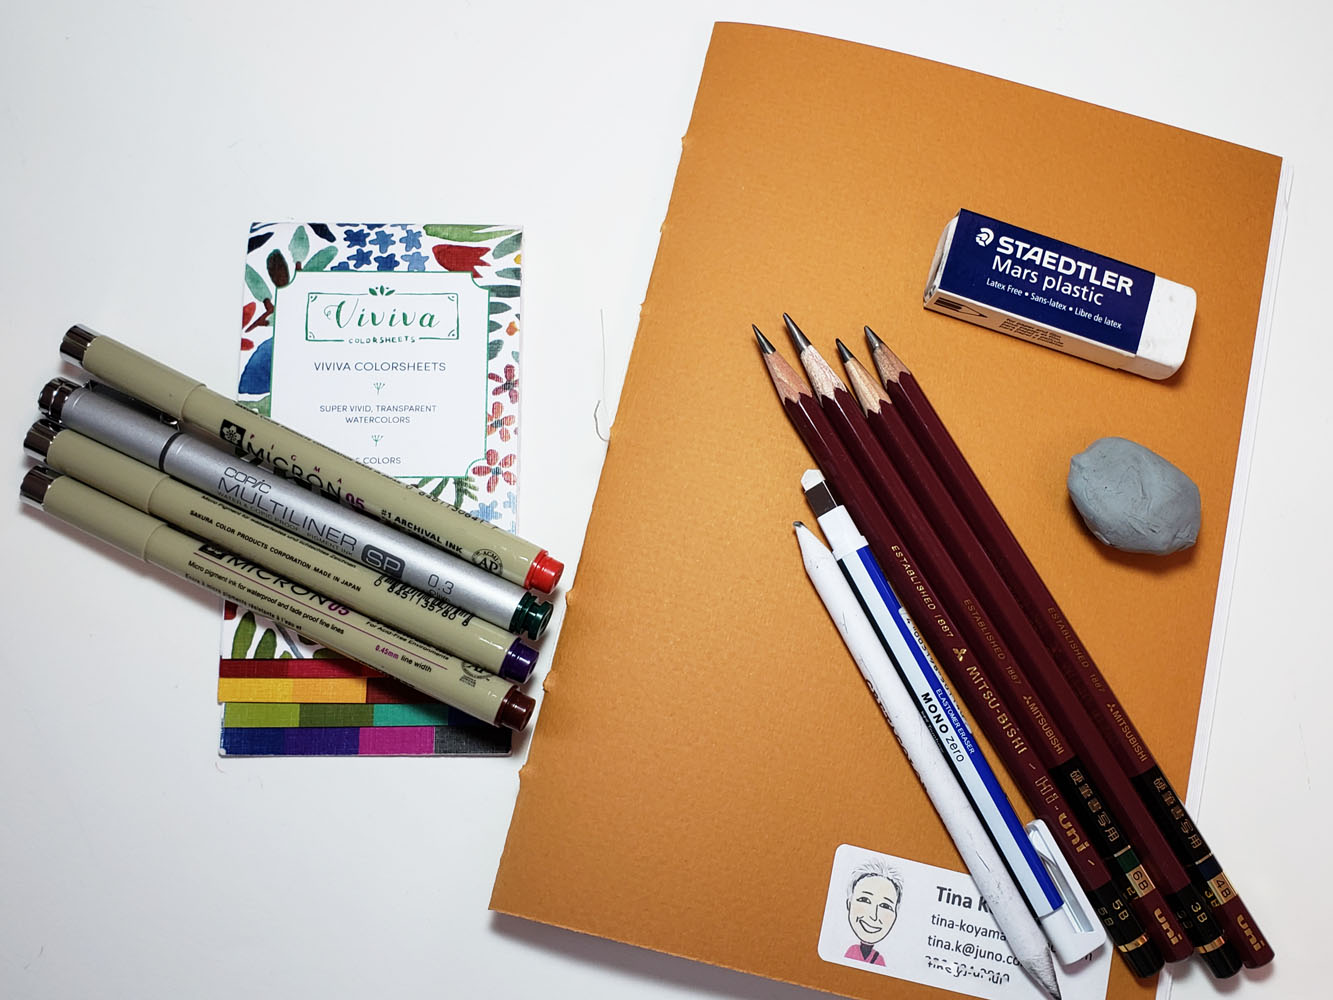
Materials I brought specifically for workshops.

What about the additional materials that were on the symposium workshop supply lists? In Eduardo Bajzek’s workshop, Graphite is the Matter, I used only one pencil, the kneaded eraser and the Tombow Mono Zero eraser. I ended up using toilet paper instead of the blending stump, and I didn’t need the signature of paper I’d prepared, either (see below for more on that). Still, it was good to have other grades of graphite in case I wanted to explore them, and I did end up using some after the workshop.

The items I had brought specifically for Lapin’s workshop – a booklet of Viviva colorsheets and some waterproof colored pens – were clearly optional, and I almost left them behind. I could have, as I didn’t use them at all. However, I did learn how Lapin uses those colored inks: To separate and distinguish certain elements in a composition. In my workshop sketch, I had plenty of color, and I thought adding more in the form of inks would not have improved the composition. But I like the way he uses color in his work, and it gave me food for thought on how a variety of tools can be used to emphasize some elements.

Ultimately, my hunch was right: I could have omitted the materials I assumed were optional. In a workshop where a specific material and its application technique are being learned, however, it’s more important to bring what’s specified by the instructor.

OK, now back to the swag. Each year, the symposium sponsorship team seems to out-do itself from the previous year, filling our goodie bags with piles of samples, information, discount coupons and even full-size sketchbooks. Shown at the top of the page are the contents of the tote I received upon registration (Thank you, sponsors!). The next day as I was walking out of the restroom before heading for my workshop, a sponsor nearly knocked me over as he handed me a landscape-format Pen & Ink sketchbook! Umm, thanks?
 
Derwent supplied Eduardo's workshop participants with
a sketchpad, pencil and erasers.
Sometimes instructors secure sponsored materials specific to their workshop topic. When we arrived at Eduardo’s workshop, participants received a sketchpad, pencil and erasers from sponsor Derwent. Although I had already prepared a signature of paper that I was planning to use during the workshop, it was smaller than Eduardo had recommended. In retrospect, working over the gutter as I had planned would have been difficult with his technique, so I was relieved and happy to receive the A4-size spiralbound pad. I think the surface has more tooth than he likes, but I really enjoyed working on the moderately textured surface for my workshop sketch. In fact, I’m thinking about stitching up the remaining sheets into some signatures for my usual daily-carry to use with graphite.

When packing for a symposium, sometimes first-time participants ask me whether they need to bring anything at all, since they know they will receive a generously stuffed swag bag. I always say that while it’s probably possible to get away with that in a general approach- or concept-based workshop (in which using specific materials isn’t important), it’s unlikely that the bag will contain exactly what they need for a workshop in which the material is critical. I did see some participants using the sketchbooks they received, so if you aren’t fussy about paper or format, it’s entirely possible to leave heavy books at home and use whatever you are given. It’s a good way to explore a new product (as long as you are willing to embrace the unknown).

In all the symposium workshops I’ve attended, the Derwent sketchpad may be the first time I’ve ever used a swag item in a workshop. It probably made a difference that the sponsor was secured specifically for Eduardo. (Though the Derwent mechanical pencils and erasers we received were not the kinds he had recommended, so I used the ones I had brought from home.)

Of course, as always, the most important item in my goodie bag is the Cretacolor pencil tin with the Porto symposium logo on it! This brings my collection to five, and I cherish each one. At this time last year when I returned from the Chicago symposium, I was completely content, believing that I had acquired every symposium tin that existed. Sometime after that, I discovered that a tin had also been made for the Barcelona symposium – but only in a very limited quantity! Perhaps only symposium staff or instructors received them. . . ? I don’t know – I only know that I saw a photo of one, and despite my pleas on social media, no one has yet come forward with a Barcelona-logo Cretacolor tin that they are willing to give or sell to me. Believe me, if I see one, I will beg, buy or steal to get it. I’m not giving up! (I suppose it’s unlikely to show up on eBay, but this is what collecting rarities is about. If you have information, call now!)
 
My pride-and-joy collection of symposium pencil tins
Meanwhile, I didn’t have to beg or steal to get another pencil box and pencils – I only had to purchase them from a lovely shop in Lisbon called A Vida Portuguesa. Everything in the shop is made in Portugal, from tile replicas to hand soap and home décor. I found a beautiful wood pencil box with a sliding top and several products made by Viarco, Portugal’s only pencil manufacturer and one of Europe’s oldest. I already knew and loved Viarco’s ArtGraf water-soluble graphite pencil, so I stocked up on several of those and a few other pencils. I also got a cake of ArtGraf water-soluble graphite. (Virginia Hein mentioned it in her landscape book, and I’ve been wanting to try it.) Viarco and A Vida Portuguesa had collaborated on making a set of colored pencils that reproduces vintage Viarco packaging, so of course I needed that, too. A modest haul, wouldn’t you say?

A modest haul from A Vida Portuguesa


Sunday, August 5, 2018

Porto Symposium, Part 3: Everything Else

7/21/18 A park near Hall of Justice, Porto
7/21/18 A collection of building tops sketched during
the final sketchwalk

At the Barcelona and Paraty symposiums, I opted for full workshop passes, which enabled me to take as many as four workshops (sometimes two per day). Although I benefited from all that I learned, the experience was exhausting, and I sometimes felt overwhelmed by learning too many new ideas at once. After Manchester’s even more exhausting (though ultimately more fulfilling) experience of being a symposium correspondent, I decided to be completely unstructured the following year in Chicago with a simple sketcher’s pass, which included no workshops at all. It was fun and relaxing, though I sometimes envied other participants who spoke with excitement about the workshops they’d taken.

This year in Porto, I opted for the basic pass, which gave me two workshops and a demo – an ideal balance between structure and flexibility. In addition to the formal benefits that we registered for, we could choose from optional activities, including several sketchwalks, when we weren’t occupied with the formal benefits. I chose sketchwalks at Ponte Luis I Bridge, Sao Bento train station, the Virtudes area and, of course, the huge final sketchwalk in a large square surrounded by dozens of astounding buildings.
7/20/18 Buskers at the Ribeira


At every symposium I’ve attended, I’ve experienced a certain tension: the pull between wanting to sketch as much as possible and wanting to visit with as many people as possible – new people I’ve met and especially those I am reunited with only once a year. Porto was no different; in fact, with each successive symposium, I find the pull toward visiting with other participants to be stronger because each year I meet more people, adding to the number that I want to reunite with. The wide-open format of the sketchwalks gave me opportunities to run into or actively look for people I wanted to see while also being in superbly sketch-worthy locations.

Looking around at each sketchwalk venue, I marveled at how many people were sketching together – sometimes almost literally shoulder to shoulder. It’s thrilling to see how much Urban Sketchers has grown over the years, including symposium attendance (more than 800 participated in Porto; at previous symposiums, attendance average was about 500). But I’m also ambivalent about that growth. This year in particular, I found it more difficult to find people at the necessarily larger venues. In the evenings when I had time to catch up on social media, I kept seeing posts indicating that people I knew were somewhere in Porto, yet I never saw them in person.
 
7/18/18 Montage from the opening sketchwalk near Ponte Luis I Bridge
On the other hand, I was delighted by serendipitous encounters with blog readers and other followers whom I didn’t know at all until they spotted me and came to tell me that they appreciate my blog. It’s probably one of the most gratifying aspects of the symposium – meeting people in person that I have otherwise known only online, or meeting people who are quietly reading my blog, previously unknown to me.
7/20/18 Dom Pedro IV monument in Praca da Liberdade and
Sao Bento station behind it

To increase socializing opportunities, I attended drink/eat & draws in the Ribeira area as much as I could stay awake for! The partying and continual conversations are difficult for an introvert like me. Ultimately, though, after all the ink has dried and the sketchbook pages have been scanned, my fondest memories of the symposium are always about the people I saw and will look forward to seeing again at future symposiums.

I am always grateful for the many USk volunteers who work hard all year to make each symposium possible. This year, I also appreciate the local Porto hosts and the Portuguese people in general, who were so gracious, welcoming and enthusiastic.


7/18/18 drink & draw 

7/19/18 USk President Amber Sausen bursts into song to get
our attention for the morning meeting.
7/18/18 Porto buildings
7/19/18 drink & draw

7/19/18 Torre do Clerigos
7/21/18 Musicus Ensemble performing at the closing reception

Final sketchwalk in the town hall square

Sketchwalk at Sao Bento train station filled with tiled walls

Sketchwalk at Vertudes

Following very competitive bidding, I won this spectacular drawing by Eduardo Bajzek in the silent auction!


Joan Tavalott

Mike Daikubara and Kumi Matsukawa

Elizabeth Alley
Alvin Wong

Gabi Campanario

James Hobbs

Jane Wingfield and Sue Heston (among the 800!)

Javier De Blas and Greg

Joel Winstead

KK

Lapin and Natalie Taylor (and me, photo-bombing my own photo as usual)

Paulo Mendes, one of our extraordinary symposium correspondents!

Peggy Wong

Shiho Nakaza and Liz Steel
More drinkin' and drawin'!


800 strong at the final sketchwalk and group photo

Can you find me?

I'm right there (in the red shirt)!

Next year: Amsterdam!

Friday, August 3, 2018

Porto Symposium, Part 2: Bajzek Workshop

7/19/18 My finished sketch from the workshop

A discussion of Graphite is the Matter, the workshop I took with Eduardo Bajzek, requires its own post because I am so intrigued by the process he uses that I want to document it thoroughly as a reminder to myself.

As happened with nearly all symposium activities, Eduardo led us on a steep, lengthy hike to his workshop location. A relatively quiet, pedestrian-only alley had tables for a small café and, as always, tightly stacked buildings forming a canyon.

To begin the workshop, Eduardo encouraged us to relax and prepare for the work ahead by sitting in silence for two full minutes with our eyes closed. He didn’t call it meditation, but he said he begins his own drawing and work practice this way to relax and quiet his mind. After the physical exertion of hiking uphill, my mind buzzing with thoughts about the symposium and conversation with other participants, it was a surprising and delightful way to begin.

Eduardo’s method involves three aspects:
  • The technique of using simple tools – pencils, erasers and a blending stump – to build forms with the matter of graphite.
  • The approach of focusing on masses instead of contours and shapes instead of lines. (This approach brought to mind the #30x30DirectWatercolor2018 challenge that Marc Holmes recently initiated to encourage watercolor painters to work directly with paint instead of relying on line first. I didn’t participate in that challenge, but I read several blogs and social media commentary by participants, and as I worked in the workshop, I immediately saw parallels with some of the challenges the watercolor participants had struggling with. Eduardo even called this method a painterly approach to using graphite.)
  • The concept of working from the outside in – from larger shapes to progressively smaller ones.

 
Workshop location
Eduardo showed us many examples of this
technique in his sketchbooks.


Because his method can be time-consuming and he knew he wouldn’t be able to demo a complete drawing large enough for all to see easily, Eduardo prepared for the workshop in an impressive manner that I really appreciated. Several days before the workshop, he scoped out his location and then spent more than two hours on a drawing. Another day, he came back to the same location and started a new drawing of the same view, this time stopping after about an hour. 
Eduardo's one-hour sample
Eduardo's two-hour sample

For the workshop participants, he pulled out a clean sheet of paper and started a fresh sketch – again of the same view. The demo itself lasted only about a half-hour, but because he could show us two more versions of how he might continue working on the drawing, we could see his additive process of honing the work and shaping the matter of graphite.
 
Eduardo during his demo
At each stage, the drawing looked relatively finished, and the main difference among them was the level of detail added. If a composition is strong and the values read well, then a drawing can have very little detail and still look finished.

Before beginning to draw, he talked quite a bit about observing closely to select a strong composition, but defining the drawing’s focal point is not important early in the game. This surprised me a bit, as I always find myself honing in on a focal point almost immediately before starting a sketch, as it’s usually the first thing that catches my attention.

Several more things surprised me as I watched him demonstrate. I always view Eduardo’s finished drawings as being very tight and controlled. Yet he applied the initial scribbles of graphite very loosely and quickly. The idea is to cover nearly the entire page (except large areas like the sky that would be left white) with a light, even tone of graphite. At this stage (and for quite a while after), no “drawing” of lines is allowed – none! Do you know how hard it is to resist putting down a meaningful line to define the side of a building, for example, or a roofline?! This is when my head started exploding, because up to this point, graphite in my hand has always expressed itself as a line – not a mass or shape. (I think some charcoal artists work in this manner, but given my avoidance of all things charcoal, I hadn’t experienced using this method at all.)
Eduardo applying graphite for the initial tone

Another thing that surprised me was the very specialized material he used for blending large areas of graphite once he had scribbled on the initial tone: toilet paper! This tool hadn’t appeared on the supply list, but he laughed as he explained how handy it is. (If you’ll recall, I said in my workshop prep post that I already own so much of everything that I didn’t have to buy a single item for the symposium. It turns out that I was also prepared with this item! I’ve had enough experience traveling outside the US that I always carry a partial roll of TP everywhere for its more conventional purpose in public restrooms. I never thought I’d use it during an urban sketching workshop!) The purpose of this step is to blend and unify the composition by making the tone as solid and even as possible.

I was also surprised that he used a Staedtler 3B grade for this initial scribbled and blended tone. I would have guessed that a slightly harder, lighter grade would be used initially (with gradually softer, darker grades used later), but he prefers using softer grades to avoid making inadvertent indentations in the paper and to make the application of tone go faster.

The final surprise? After he finished putting on this initial tone, he started defining some of the lines – the edges where rooflines met the sky, walls, etc. – but not with the pencil’s point. He used a kneaded eraser. (Can you see the contents of my brain continue to scatter in the street? It took me quite a while to stuff all the pieces back in!)

After that, the process was continual repetition of the previous cycle: Add more tone, this time more selectively; smudge with toilet paper and, when a finer stroke was needed, the blending stump; use the eraser to sharpen edges and continue to shape the forms. In a half-hour, he had produced a sketch that wasn’t quite finished but that had enough clearly defined forms and values that it “read” easily. The one-hour and two-hour samples he had prepared previously helped us visualize how he might have continued many more cycles of tone/blend/erase with the addition of sharp details to provide the focal point.

The view I selected.
Now it was our turn. I chose a relatively simple composition of the main canyon of buildings on either side of the pedestrian alley for its lack of detail. I thought this would keep me from being tempted to fiddle with too many lamp fixture curlicues. I also avoided identifying a focal point.

As I mentioned, resisting the impulse to “draw” the building contours was similar to resisting gravity – it felt very physical! I had planned to photograph my sketch at each stage as a reminder, but I don’t have a photo of that initial laydown of tone because I was too busy fighting my own arm, hand and pencil point. By the time I thought to take the photo below, I had already begun defining the shapes with the eraser and later the pencil point (that’s allowed, but only after the eraser has done the initial job).
 
Early stages of my sketch: Tone applied; shaping with eraser and pencil point begun.
When Eduardo came by to check on me, he encouraged me to use the TP more often to unify the composition. I said I didn’t want to smear the areas I had already started darkening, but he said not to worry about that until I was ready to work on fine details toward the end. At this stage, it’s still all about value and tone, and the nice thing about graphite is that the darker areas will always remain darker, even if TP’d, because of its layered, cumulative nature.

Smudging with TP begun.

Some darks picked out.

Eduardo suggested more use of the TP to unify the composition.

It was this late in the game that I finally decided to put in a lamp fixture with fine detail as the focal point.

 
Using nothing but a Mitsubishi Hi-Uni 3B (which is slightly softer than a Staedtler of the same grade), I worked for about an hour and a half on this drawing. (I meant to switch to a softer grade as I worked on darker areas, but I forgot.) I stopped before the end of the workshop because I was afraid I was going to start getting fiddly if I kept going. Perhaps more important, I really liked the way my sketch was at this point (top of post). I mentioned in my previous post that I often don’t like work I produce in workshops because it tends to feel like exercises or reflect the instructor’s vision more than my own. In this case, I was using an approach and technique that are distinctly Eduardo’s and not my own, yet I ended up pleased that I could follow both and still end up with a sketch that I like.

The challenge with learning a distinctive technique that is clearly associated with an instructor who teaches it is that I don’t want my sketches to simply be bad imitations of Eduardo’s work. ðŸ˜‰ That remains an issue for me – I want to find a way to use this technique and make it my own. 

7/19/18 Torre dos Clerigos
Once I finished stuffing my brain back into place, I went out immediately and tried using what I had just learned on a very small sketch of the Torre dos Clerigos (at left). This is exactly the type of building that I would normally draw with a fountain pen, initially enjoying all the tiny details but then getting lost in those same details. Using this tonal method, I was forced to focus only on the broad shape first. On this small sketch, I used the stump to blend, and I also used the fine edge of the Tombow Mono Zero eraser to define lines instead of the kneaded eraser.

A couple of days later during a sketch walk in the Vertudes neighborhood, I was attracted to the light on some trees that looked like it would be just right to practice the technique again (below). I used nothing but the 3B pencil again, but in retrospect, I should have used a softer grade later to bring out the darks more.
7/21/18 Vertudes
 Several days later in Coimbra, I made a sketch that turned out to be my favorite of the entire trip (below). You’ll see this sketch again later when I talk about my trip highlights (and lowlights), but I wanted to show it here because this time I remembered to take a photo of the initial toning step. 

7/25/18 Coimbra

Initial toning for Coimbra sketch at left


You can see how scribbly and loose it is and how I’ve resisted (though barely) “drawing” the buildings. This time I remembered that I had several other pencil grades in my bag, so I used a Hi-Uni 6B on the darkest spots. I erased out the white umbrellas with the kneaded eraser (and successfully resisted “drawing” them first with the pencil point! Wahoo!). When I posted the sketch on Instagram, Eduardo commented as follows:

Wow! That’s great Tina!! The buildings on the background are just perfect. You know, once one very experienced artist said to me: connect the dark shapes... make a path with them. Maybe this suggestion could be apply here, connecting the tables/people marks with a shadow on the ground. Hope you don’t mind 😉

The workshop was long over, but I got free feedback from Eduardo! You can bet I considered his suggestion. I put in a quick shadow exactly as he suggested, and it made a big difference. (It’s that unification thing again that Veronica Lawlor mentioned.)

I don’t expect many of you to have kept reading through this lengthy post, but if you did, I hope you found this process as fascinating as I did! Thank you, Eduardo, for a mind-blowing workshop!

Related Posts Plugin for WordPress, Blogger...