Showing posts with label studio. Show all posts

Saturday, November 29, 2025

Curated


The current exhibit of art from generous friends

Making use of a narrow space
As you might guess, I have lots of arty friends. They have given me many small art works and handmade cards over time, and it has bothered me that I’ve simply stashed them in a box. They should be displayed and rotated regularly so that I can appreciate them and think about their makers’ love and generosity.

I finally found a solution I like: It’s similar to a cork board in execution, but the material is a modular set of felt-covered boards. I have several more square modules and a little more wall space in my studio, but I don’t want to invite visual clutter. I might leave it like this for now (top of post) and see how I like it.

In a small, narrow space between a studio window and the closet that was otherwise being wasted, I put up a couple of the felt modules vertically (at left). Although the vast majority of my work is in bound sketchbooks where they will stay, clearing out and moving my studio last year turned up a surprising number of sketches on loose paper. I’ll put some of them into rotation in this space. Currently on exhibit is the Gage Drawing Jam promo poster from a couple of years ago that features my life drawing. I also found the original drawing I used to print a Valentine card for the spouse guy way back in 2014.

Thursday, March 13, 2025

Drawing Table Unpacked


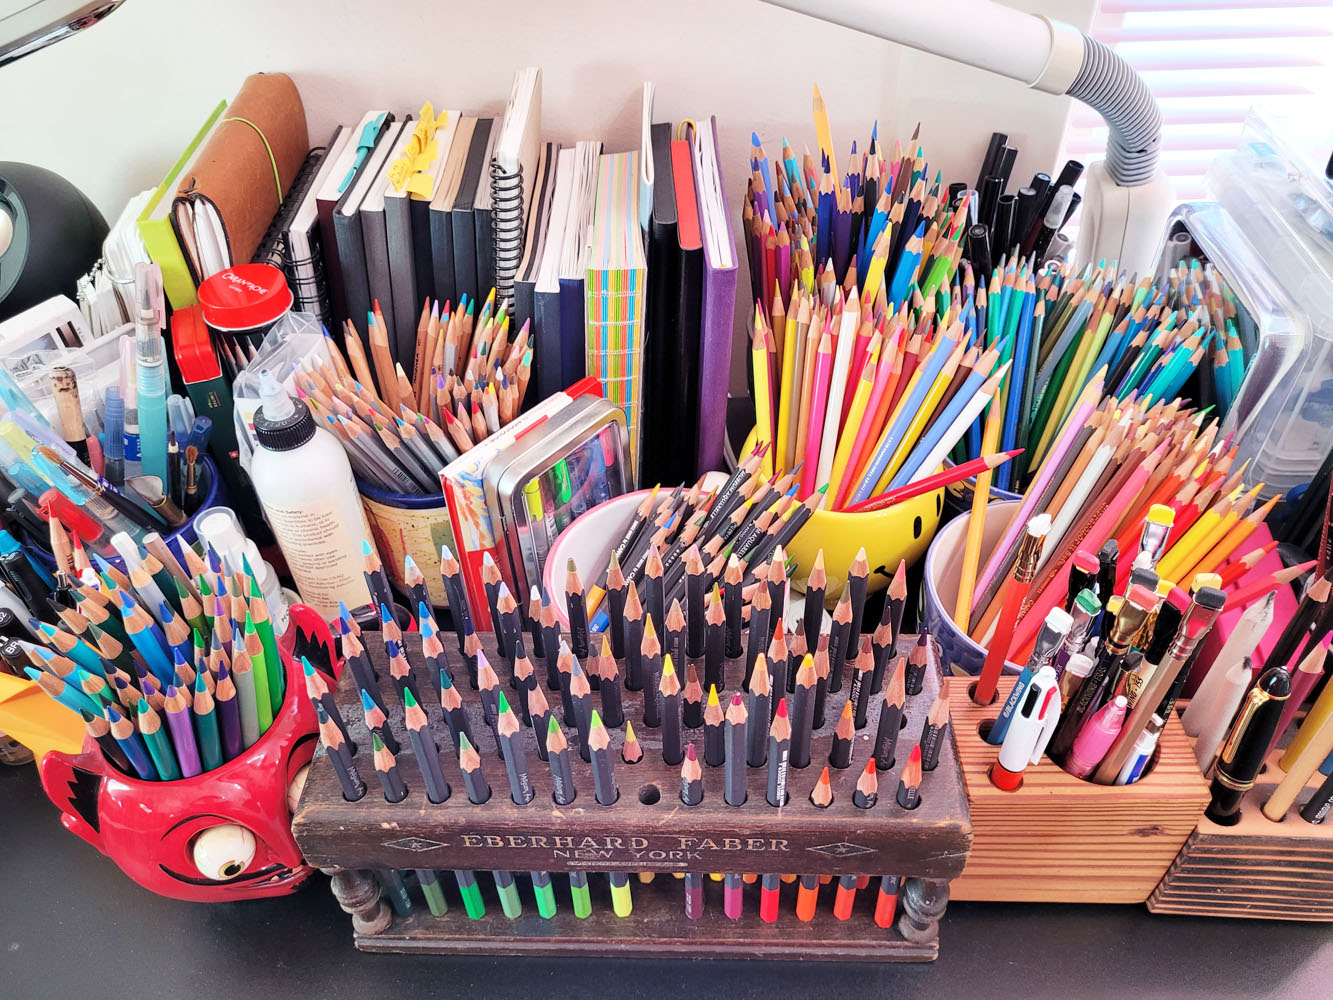
Ahhhh! It will never again be as clean and tidy as it is right now! I cherish this moment! On the desktop are my current first-tier colored pencils (Caran d'Ache Museum Aquarelles, Prismacolors and Supracolors), brush pens, brushes, graphite pencils, other pencils, ballpoint pens. All those pots might look full, but I culled each one and filled a large baggie with duplicates, rejects or just meh items that will go to the next gab & grab or charity. The wood holders contain more graphite pencils and related tools and two fountain pens. An electric AFMAT sharpener on the left and Carl Angel Royal crank sharpener on the right.

Two weeks after the move, my drawing table is finally unpacked! A lot of general busy-ness kept me from unpacking as quickly as I wanted, but much to my relief, at least this primary point in my studio/office is done. (I’m still working on organizing and storing my supplies; stay tuned!)

My new drawing table (previously Greg’s PC desk; see above) is quite a bit larger than my old one (see end of post for photo) and also has nice drawers for storage. Since it’s intended for computer use, the table has a pull-out keyboard drawer to tuck away my tablet, pencil “valet” and current project when not in use. It probably looks jam-packed, but compared to my old table, it has a huge unoccupied space! My old table started out that way a decade ago, but somehow things kept creeping in – both on top and underneath – to the point of being out of control. I’m sure the desktop contents will evolve as I use different media, but I am going to do whatever I can to keep it from getting overcrowded again! (More details in the photo cutlines.)

The pull-out keyboard drawer holds my pencil "valet," tablet and current project (in this case, my class homework).

I just finished my final class assignments at my new drawing table! See below for setup.

The tablet is propped up on a box of colored pencils (see below) to bring the image closer to my eye level. The sketchbook is supported by the pencil case (not visible) and the edge of the tablet, which gives it just the right angle for drawing.

In the top drawer are second-tier Faber-Castell Polychromos pencils, a few watercolor supplies, Caran d'Ache palette and a box of blending stumps (too many... I need to cull those).

Second drawer contains second-tier Derwent Lightfast and Caran d'Ache Luminance colored pencils, Neocolor I and II, and a few other pencils I use occasionally. (The largest, lowest drawer is, sadly, filled with file folders, not art supplies. This is an office as well as a studio.)

This side view shows my current sketchbooks in progress, mostly for desk-based work. My sketchbooks in use for urban sketching are stored elsewhere (you'll see them eventually).

BEFORE: My train wreck of a drawing table shortly before I packed it up for the move! Note that the working space is very small because so much stuff is crammed onto the surface -- not to mention under the table! Hardly any room for my feet on the footrest!

Monday, March 10, 2025

My Sketchbook Bookcase


More than 13 years of sketchbooks -- plus a little room to grow. Most books are in chronological order, but, of course, many books were used concurrently, so absolute chronology isn't possible. On the fourth shelf from the top, my colorful Uglybooks fit compactly and tidily in plastic storage boxes. Unfortunately, much of the bottom shelf gets wasted because the heating vent is behind it.

This sketchbook from 2020 expresses a little attitude.
A couple of weeks ago, I viewed a YouTube video that stabbed me directly in the heart. Teoh Yi Chie, better known as Parka, talked about how he lost nearly all of his completed sketchbooks.

As I was packing up all my sketchbooks for my move, I thought about Teoh and felt his loss and grief keenly. Although I have digital images of almost all of my sketches, they could never take the place of the bound books I carried around and filled daily, a page at a time. I couldn’t linger as much as I would have liked, but as I handled the books, I occasionally flicked through one, and it was like a visual flashback. Even the covers – handmade with ephemera when I traveled, or stickered with editorial commentary – captured the contents or era.

A couple of months ago when the media were filled with stories about Californians who had lost everything to fire, I realized I need to learn to detach myself from physical possessions, especially those I create myself. I have disposed of quite a few old artworks from my fiber and mixed-media days, but I still have a lot more work to do. I’m certainly not ready to toss entire sketchbooks.

Yesterday I unpacked six boxes and put more than 13 years of sketchbooks up into my newly moved (and now secured) bookcase. Still thinking about Teoh, I grieved for him all over again.

The sketchbooks on the first three shelves are stacked two-deep. Although these handbound books take up the most space, they were also the most fun to handle: The cover images told me immediately what season or location I was in when I filled them.

Monday, January 16, 2023

My “Downstairs Studio,” Part 2

Panel 1: skyscapito and nocturne kits


(If you missed Part 1, read it first for the context.)

With a total of 76 mostly pencil-sized elastic loops, my “downstairs studio” portfolio case seemed plenty big enough, but I knew I had to be judicious in how I filled it. Initially I thought I would simply put all my small, specialized kits into it, but a better idea was to make my selections seasonal.

Since I use it year-round, I began with my skyscapito kit made up of Caran d’Ache Bicolors, a waterbrush and a black Uni Pin brush pen (see panel 1 above). Since it’s winter, my slimmed-down nocturne kit came next: a white Sakura Gelly Roll and a couple of white/off-white Prismacolors. Christmas is over, so I left out the metallic gel pens. In the summer when I sketch on the deck, I’ll replace the nocturne kit with Steller’s jay and squirrel colors.

The first panel shown above also includes a Faber-Castell Pitt Soft Brush Pen and a kneadable eraser because it’s the only panel that includes a few larger loops to accommodate them. I was disappointed that the pencil loops are too tight for some pens, but it just means I have to be more selective. I was pleased that my Mighty Bright XtraFlex2 Book Light (shown below), which I use for sketching in the dark, clips onto the edge of the folding panel and doesn’t impede zipping the case closed. It does block several loops on the third panel, though, so I’m not sure how long it will stay there.

Mighty Bright light clipped to Panel 3.

The center panel (below) is devoted to graphite and Bic ballpoints (in three point sizes). I may have given the Bics too much space, but since I love grabbing them for portraits, I’ll leave them in for now.

Panel 2: Too many Bics?

The third panel (below) includes a small selection of
 Caran d’Ache Neocolor I non-soluble wax pastels (a Zorn palette and a primary triad), a selection of Caran d’Ache Museum Aquarelles, and a Viarco ArtGraf water-soluble graphite pencil. The colors of Museum Aquarelles are not well-thought-out, since I use them mainly for urban sketching, but I couldn’t imagine assembling a “downstairs studio” without a few of my beloveds.

Panel 3: Neocolor I, ArtGraf, Museum Aquarelles and even room to grow.

As you can see, I left some space for growth and future ideas. I expect the contents to change often as I get inspired to use different materials. I have only one firm rule: I can’t bring downstairs any materials that don’t fit in the portfolio. If I run out of loops, then I have to take other things out to make space. This is the same way I manage my clothes closet (if I fill my finite number of hangers, I can’t buy new clothes until I get rid of others) and coffee mug collection (one kitchen shelf only). Needless to say, this system doesn’t work with my upstairs studio, which simply gets more crowded. But I have hope for the “downstairs studio.”


I’ve used the new “studio” several times for skyscapitos and portraits, and it’s working out well. I love its compactness – an easy carry around the house.

Just as satisfying as filling the portfolio was cleaning up my chairside table, which was long overdue for vacuuming and tidying. I put away materials I never use downstairs (how did so many rolls of washi tape walk down the stairs by themselves?), reevaluated others, and found a couple things I thought had gone missing. It feels good to start the new year this way. 

After!
Before


Sunday, January 15, 2023

My “Downstairs Studio,” Part 1


It doesn't look like a studio, does it?

The small upstairs bedroom that I call my “studio” is where I store most of my art supplies. (It’s ironic, but with all the sketching I do on location, I actually make very little art in my studio except the occasional still life or convenient window view.) But you may have noticed that I’ve developed numerous small kits for specialized needs. In addition to the countless portable kit variations I’ve made for sketching on location, I’ve also put together one kit specifically for night sketching, one for sketching birds and squirrels from the back deck, and another for skyscapitos (sunrise and sunset colors).

These highly specialized kits are driven by practical needs: The subject matter is time-sensitive. The sun ain’t gonna wait for me to run upstairs and pick out materials, and neither are the jays. In addition, in the early morning, I don’t want to disturb the spouse guy sleeping in the room adjacent to my studio by rummaging around for tools. I need to have my specialized kits located in the areas where I use them.
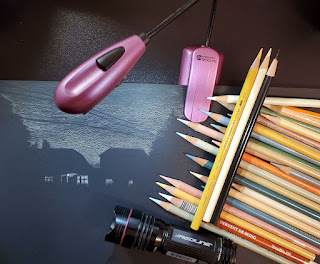
Nocturne kit

Just lately, I’ve been driven by another need: Despite being an avid sketcher, in the evening, I run out of steam. It’s hard for me to work up creative energy when I’m tired. I had gotten into the bad habit of spending evening hours scrolling through social media or bingeing on YouTubes that were neither entertaining nor informative.

In a conscious effort to break that habit, I’ve been looking for ways to practice drawing or otherwise be creatively productive for at least part of that evening time. To be successful, it’s important that I minimize barriers. For example, looking for subject matter around the house requires too much work, and even searching for Google images to draw from can be daunting – I could easily spend the whole evening searching instead of drawing. That’s why I’ve been thrilled to discover Earthsworld’s treasure trove of portrait photography: From a single source, I can randomly or more thoughtfully choose a photo to practice portraiture – a subject that I have been wanting to develop for a long time. I’m motivated to practice, and it’s also easy to find source material.
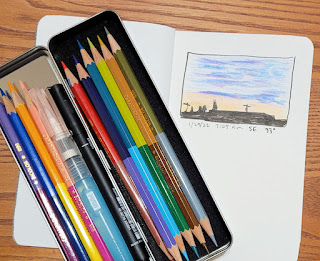
Skyscapito kit

Having everything accessible downstairs where I tend to spend evening time is also important. Encouraged that I had found an enjoyable and productive way to break a habit, I started wanting more supplies: Bics, Neocolors, a couple of colors of Uglybooks. Whatever I wanted was still upstairs, and my potential laziness to go get them became another barrier I had to eliminate. More materials started creeping down the stairs. My “reading” table, which formerly held only a stack of books and one mugful of pens and pencils that I use in my journal, was turning into a cluttered studio annex. I needed a solution.

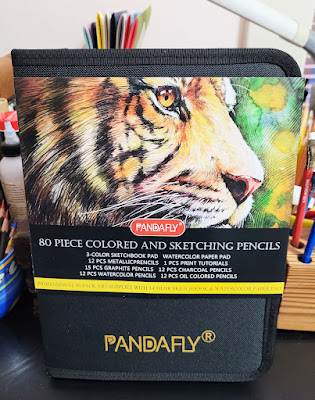
Around the holidays when Amazon was bombarding me with gift ideas, one image caught my eye. It was a “complete drawing kit” including a variety of colored and graphite pencils, tools and sketchbooks, and the entire contents came in a zipped-up case like a small portfolio. Having always acquired my art materials ala carte, preassembled kits had been off my radar.
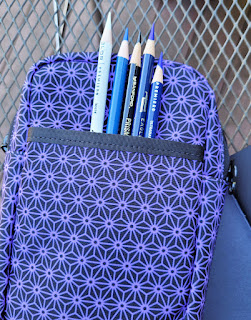
Stellar's jay kit

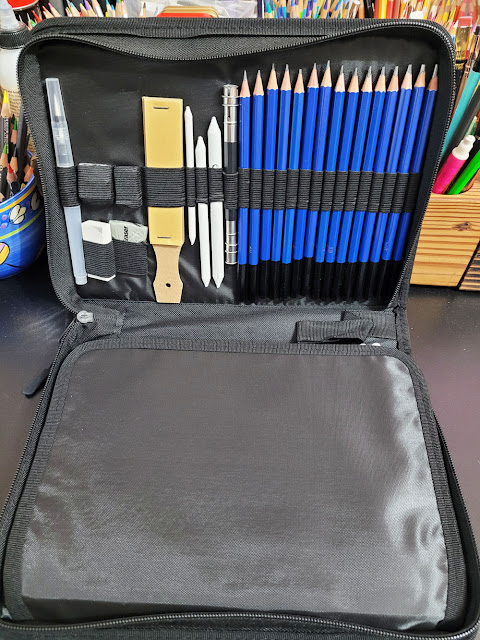
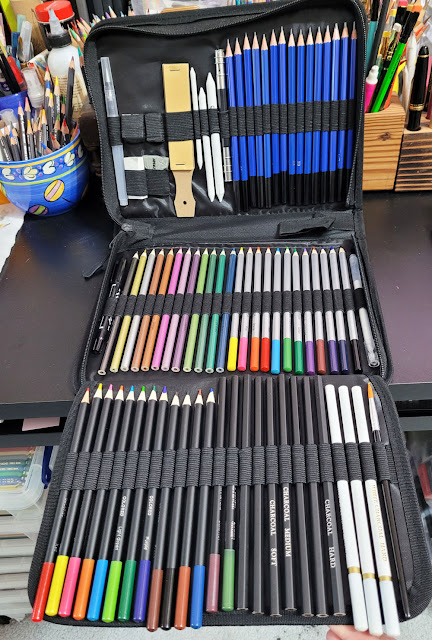
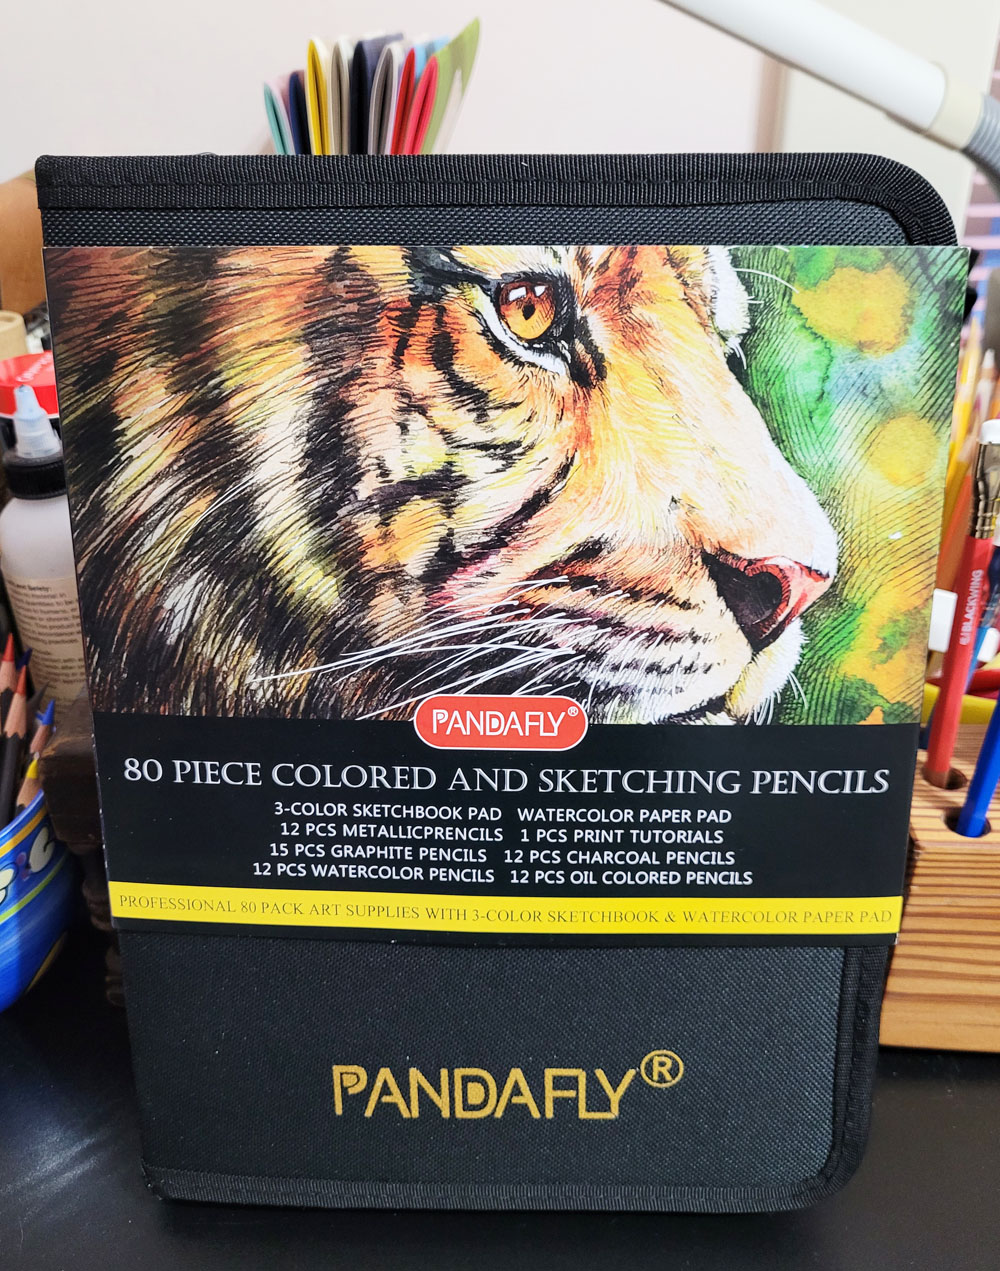
I started looking at more options, and, of course, I found many – a multitude with slight variations in content and form factor. The contents, likely mediocre, didn’t interest me, but the zipped-up cases did. I wanted one that was neither too big (which would only tempt me to move more of my studio to the annex) nor too small. Since I wasn’t planning to carry it around, weight and bulkiness weren’t primary concerns, but I did want it to be compact. I found one that would require me to be judicious but still be comfortable: Seventy pencil slots plus space for a few non-pencil items seemed about right. At 8 ½ by 11 ½ by 1 ½ inches, it wouldn’t take over my whole reading table.

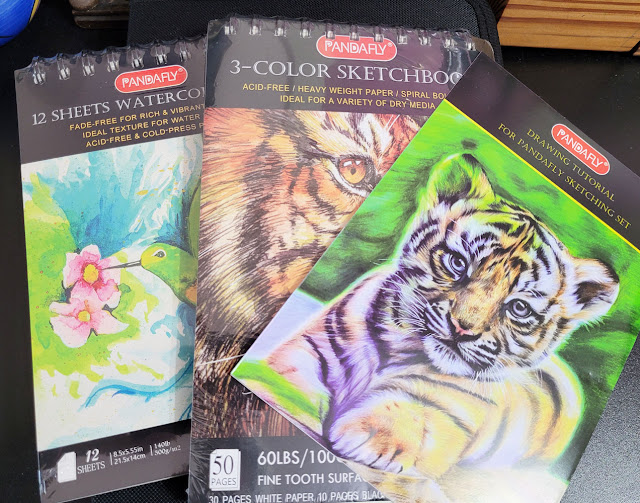
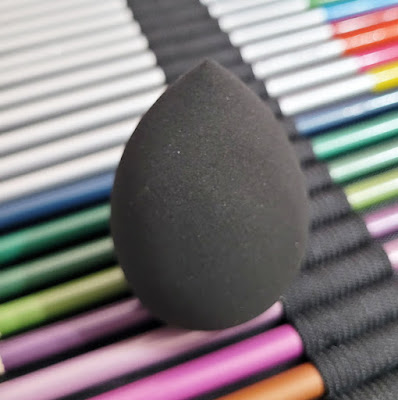
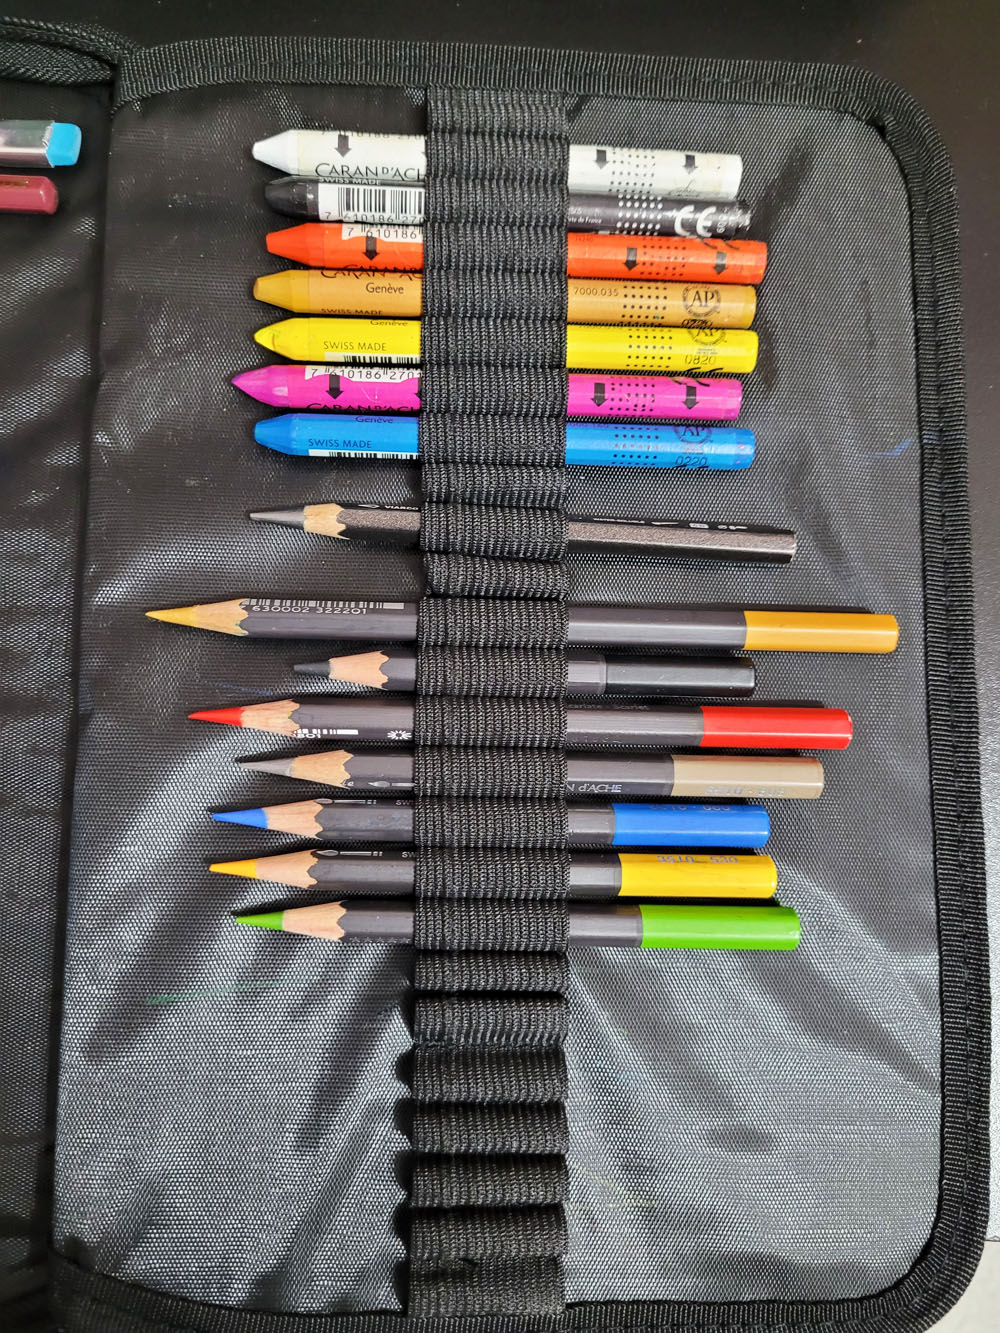
Made by Pandafly, it was 20 bucks – a price I would have been willing to pay even if the case had been empty. In fact, it was filled with colored, watercolor, metallic, graphite and charcoal “prencils” [sic], sketch pads, pens, erasers, blending stumps, two sharpeners with varying hole sizes, a sandpaper block, a paintbrush, a waterbrush and an interestingly shaped “rub sponge.” A drawing tutorial is also included. Considering the price, this kit has thought of everything.
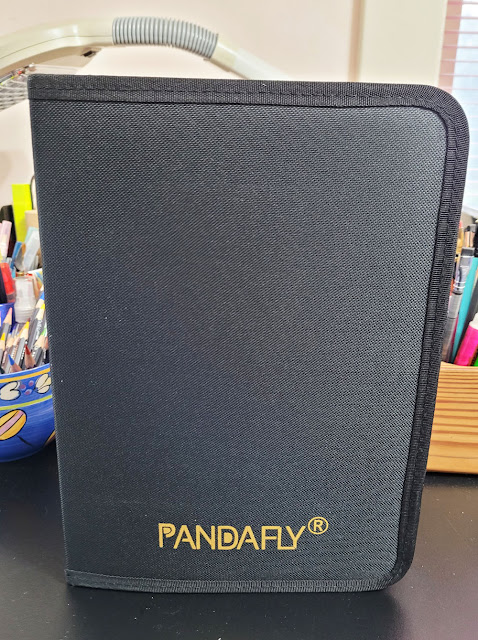

The zipped-up case is 8 ½ by 11 ½ by 1 ½ inches.

Unzipped

Fully opened

Two sketch pads and a tutorial included.

The most surprising kit item: an egg-shaped "rub sponge."

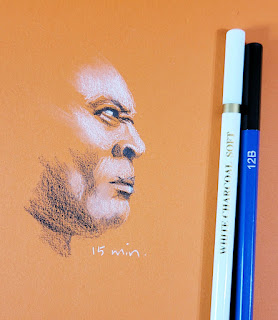
1/5/23 white charcoal and graphite in Uglybook sketchbook
(Earthsworld reference photo)

Made in China, the materials are not ones I would write home about, but neither are they as bad as I had expected. After giving everything a perfunctory scribble, I used a white charcoal pencil and a 12B graphite pencil to make a sketch, just for fun. Notably, all the kit’s pencils hold the distinction of being the only ones in my vast collection without any kind of branding: Completely nameless pencils are hard to come by!


Aside 1: When I first began looking at these, I was ambivalent about the “complete drawing kit” concept. As a gift to a budding artist, especially a younger one, it’s a convenient, compact, inexpensive way to present a variety of materials to play and experiment with. If the kit had contained truly terrible materials, though, I was afraid they would be discouraging (the issue I had talked about in
my recent Crayola post). The items in the kit I purchased, however, are decent enough that they could satisfactorily whet an appetite for drawing without being discouraging. That made me feel better. I do wish, however, that the portfolio could be purchased empty. Filled by an experienced artist for another who is less so, imagine what a nice gift that could be.

Aside 2: A couple of reviews had mentioned the kit having a strong odor, which made me leery. However, the “odor” turned out to be the delicious licorice scent I love about Prismacolor and Arrtx colored pencils! They must all contain a binding ingredient that delightfully evokes Good & Plenty.

Good & Plenty notwithstanding, I didn’t buy the kit for its contents. After taking these photos, I immediately removed everything (I plan to donate them), and then the fun began: Filling the case with my own stuff. Stay tuned for Part 2.
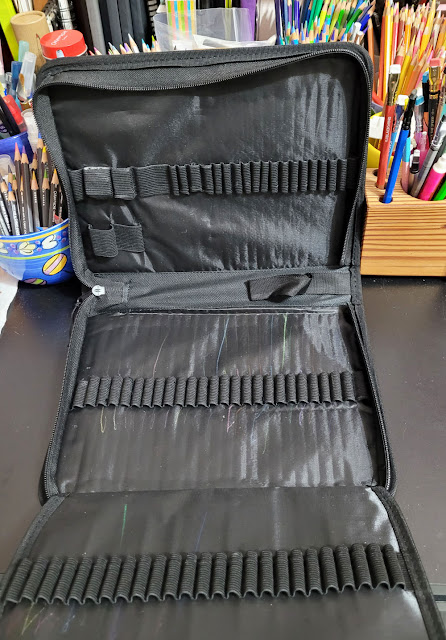
Empty and full of potential!

Sunday, September 18, 2022

My New, Very Old Eberhard Faber Pencil Stand


Nearly a century old and now on my desk. When I purchased it, the Eberhard Faber pencil stand came with several vintage and affectionately hacked pencils from the seller.

Despite my obvious love for vintage colored pencils, I’m not a collector or hunter of antique furnishings or other objects. In general, I stay out of antique shops to avoid temptation (though occasionally I can’t resist). Apparently I always have one eye open, though, for special items that are exactly right.

One day in the Erasable Podcast Community Facebook group, a member posted photos of a vintage Eberhard Faber pencil display stand that he was selling. A 1923 Eberhard Faber catalog shows the pencil stand, which means the model is nearly a hundred years old. As soon as I saw it, visions of pencils danced through my head: It’s the perfect display for some of my favorite vintage pencils! In fact, it’s exactly what I’d been looking for, although I didn’t know it until I saw it.

Image from Pen Collectors of America

The advertisement for the Eberhard Faber Diamond Star “No. 29 Mahogany Stand With Assortment of High-Grade Items” indicates that it was a retail display. (What?? Consumers didn’t display pencils in their homes this way??!) Here’s what it says about the stand, which came with pencils:

The mahogany stand is an extremely useful advertising display piece, as well as a handy “silent salesman.” It is a high-class stand, with high-grade articles, and the finest stationery stores of the country will be proud to display it.

Imagine walking into a stationery store (sadly, such stores are becoming increasingly rare) and seeing “high-grade articles” displayed this way! Indeed, that “silent salesman” wouldn’t have to work very hard on me.

With some signs of age and wear, the pencil stand has many stories to tell. I could clean and polish it if I wanted to, but I think I’ll hear those stories better if I leave it as is.

Of course, I had initially intended to fill it with vintage colored pencils; in fact, I have several Eberhard Faber sets I considered. But the rack had probably been sitting in a dark storage unit for years, despondently without purpose. It deserved to be put to daily use as well as admiration.

With 72 holes, it was almost perfect for my favorite Caran d’Ache Museum Aquarelle pencils. After weeding out duplicates and some stubs too short to fit in the stand, my Museum Aquarelles fit beautifully – with a couple of holes to spare. The Eberhard Faber Diamond Star retail display is once again both high class and functional.

Still functional and beautiful after all these years.

Two empty holes after filling with my Museum Aquarelles.

Nicks and wear have a hundred years of stories to tell.

Museum Aquarelle stubs and duplicates

Incidentally, the seller was Ali Serra, owner of the Etsy shop Ernest Theodore, where I have made fun and inspiring purchases the past few years. He’s local, and we had met last year at an in-person pencil meetup (yes, there is such a thing). Shortly after I had made the purchase, a few Erasable members got together for another meetup. With my pencil peeps admiring my new acquisition, it was an appropriate handoff for the old Diamond Star.


A parking lot transaction. 

Although we would have preferred to chat about pencils over a table of food or beverages, we settled for a tailgate meetup at a Tesla charging station (where one member had to make a quick stop while breezing through Seattle). With me are Ali, Julia, John and adorable Ernest Theodore, the namesake of Ali’s shop.

A new home for the No. 29 Diamond Star display

Friday, June 24, 2022

Soft Landing: Rickshaw Valet


Rickshaw valet and wallet

It’s no secret that I’m a huge fan of Rickshaw Bags. Ever since my first Zero Messenger Bag (now 10 years old and still looking great), which has traveled with me to four continents, I’ve found reasons (and excuses) to buy more bags in other colors, sizes, fabrics and styles. I also have several stationery and daily-carry accessories (search “Rickshaw” on my blog, and you’ll see most of my collection). Handmade in San Francisco, the products are all well made, durable and – the most addictive part – color-customizable!

Two accessories recently caught my eye. The one that’s art-related is the plush Valet Tray. Traditionally, a valet is used by men as a pocket dump, but it’s meeting a different need of mine. When I’m working on a drawing or other project at my desk, I’m constantly picking up and putting down various pencils, pens, scissors or other tools, and I don’t like the noisy clatter they make on my desktop surface or a hard tray. The rectangular 4-by-8-inch valet is an ideal size for giving my tools a soft, silent place to land – it’s plush-lined! (Yes, my pencils have a more comfy seat than I do. I don’t buy Rickshaw’s gorgeous, plush-lined fountain pen cases or coozies because I refuse to let my pens be better dressed than I am.) (OK, I do have one Clover Pen Sleeve [alas, no longer available], seen in this post, but it has a specific travel purpose beyond keeping my pens warm and stylishly dressed.)

This plush-lined valet is sized just right for pencils! When the corners are unsnapped, it flattens for storage or travel.

The second recent purchase is even more exciting because it’s something for which I have been searching a long, long time. I gave up on women’s wallets and “secretaries” decades ago because they are always too big, too bulky and have too many unessential compartments. I’ve been using a men’s “money clip” for years, but the leather slots have gotten stretched out, and the cards are no longer secure. Although I’ve looked, I haven’t found one as simple as the one I have.

Rickshaw’s newest product is exactly what I need: The small, thin Snap Wallet – just large enough for the few cards I carry and nothing else. Like my favorite Rickshaw bags, the colors and fabrics are customizable. Naturally, I got one in waterproof, purple X-Pac fabric to match my “winter” Zero Messenger.

Thin and small

Just enough room for a few cards, bills, ID and nothing else.

Will I get a wallet to match every bag (unfortunately, they don’t offer pink fabric to match my pink “spring” Zero Messenger)? Don’t even suggest it. But at $19, it’s certainly a good value.

Matchy, matchy.

Monday, April 20, 2020

Product Review: Shiny DIY Printing Kit

Shiny DIY Printing Kit

Whenever I finish a daily hand sketch, I date and number it. I thought it would be fun to use some kind of date stamp for this ritual, so I started looking around for one. Yoseka Stationery, a delightful New York City shop, showed something on Instagram that was exactly what I was looking for: the Shiny DIY Stamp Printing Kit.

I chose the larger kit, which includes character sets in two sizes. Also in the kit are seven platens in various shapes to set the type, a handle, tweezers and ink pad. A smaller kit is also available with one character set.
 
Kit contents. The round and oval platens will be fun for other projects sometime.

In addition to all the letters of the alphabet (upper and lower cases), numbers and symbols for several languages, the kit includes useful shortcuts like .com, P.O. Box, http:, etc. The character sets are clearly intended for printing things like impromptu business cards, tags or notes that might include contact info.
 
Two sizes of characters.


Tweezers can be used to grasp and place the tiny letters.

Useful shortcuts included.

The box is designed to organize and hold all the pieces neatly. Diagrams in the tray compartments show you where things should go so that everything fits perfectly. (I must say, however, that unless every piece is put back in its place exactly so, the lid will not close.)

Diagrams show where all the pieces go!

Setting lines of type with those tiny letters is easier than I thought it would be. Although I don’t have to use the included tweezers to pick up the letters and place them in the platens, they are handy for removing letters or pushing them into place.


I used a single-line platen to make a stamp for the hashtag I’ve been using (#washyourhandthendrawit) and a two-line platen for the number and date. 


Be sure to test each stamp before stamping on your finished work and fix any typos (lowercase b’s and d’s are easy to confuse when they’re backwards).


The handle makes it easier to ink and stamp, but the first time I stamped on my hand sketch, I forgot to attach the handle. I found that the platen is easy enough to ink and stamp without the handle.
 
Platen can be used with or without detachable handle.

I love this kit! It’s compact and easy to use. The hardest part about it will be remembering to change the date before I stamp.

Related Posts Plugin for WordPress, Blogger...